
The future of collaboration!
save on travel costs, emissions and time
Workshop building VR MetaSpaces with Mozilla Hubs
Build your own MetaSpace? We are happy to help you on your way in this tailor-made work session. Learn to build VR MetaSpaces with Mozilla Spoke, publish custom spaces to Mozilla Hubs and more....
The building session takes place via Zoom or Teams and the room(s) that are built during the sessions. VR glasses are not necessary. These areas can also be visited with a computer or smartphone. Building the MetaSpace, is best done with a desktop or laptop computer.
Tech workshop, supervised by Raoul Postel (Work-in-VR.org CreativeHubs.nl), maker, certified teacher in creative technology.
What are you learning?
- what is social VR
- how does Mozilla Hubs work;
- basics to learn building MetaSpaces in Mozilla Spoke
- publish and share your own MetaSpaces online.
To start with:
You need an e-mail address with which you can log in. As soon as you log in to hubs.mozilla.com, you will receive a link by email with which you can log in. Then you can edit and build spaces.
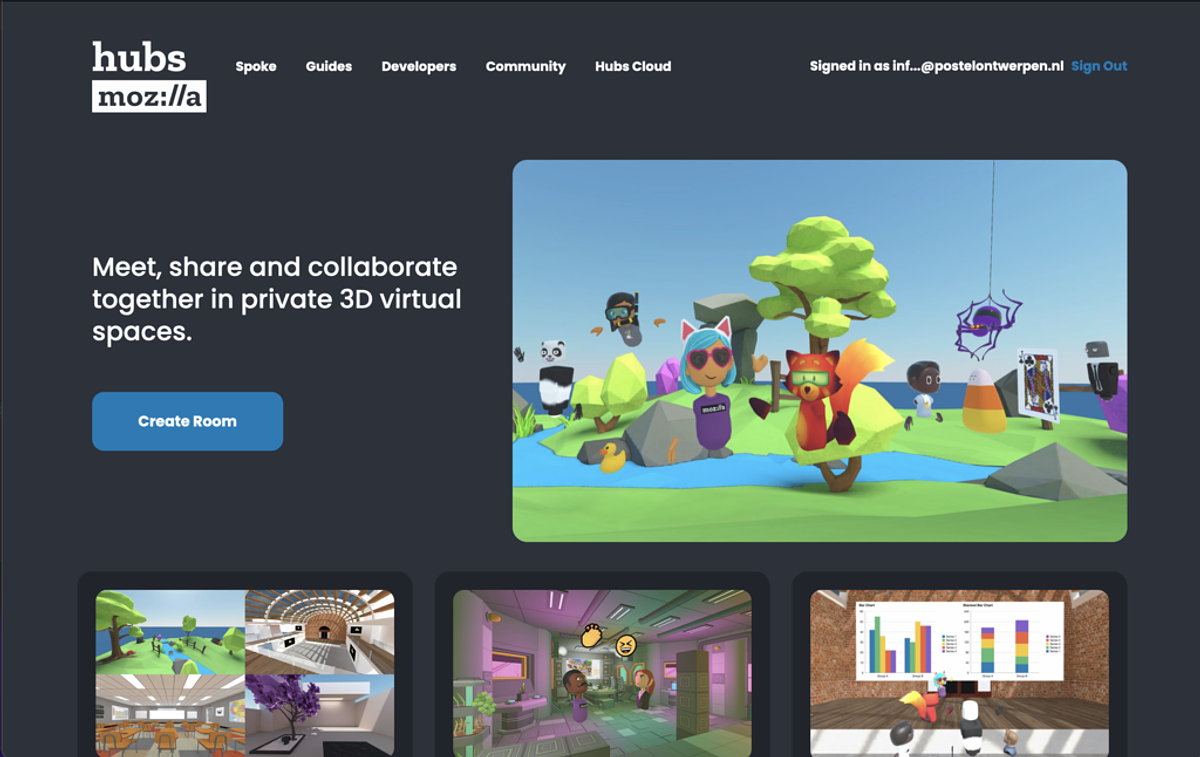
STEP 1 RESEARCH MOZILLA HUBS:
- Visit: https://hubs.mozilla.com
- Create your own Room (Create Room)
- Choose an avatar and type your first name
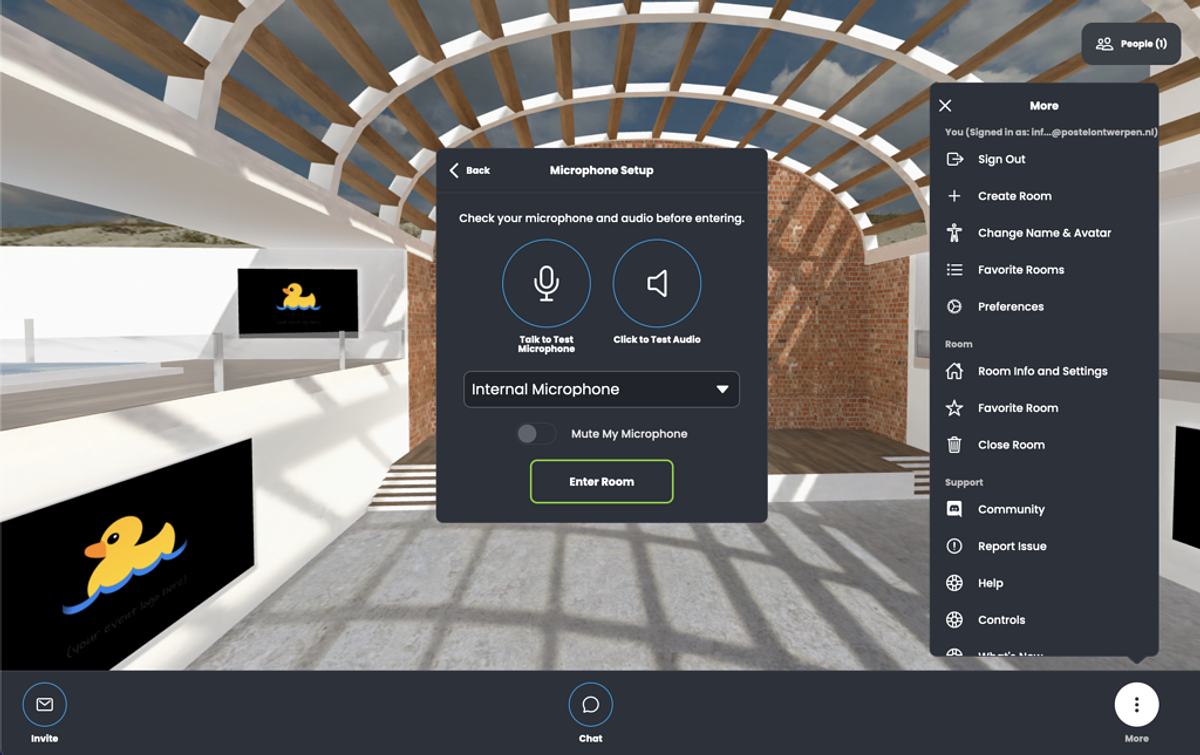
- Save the changes and enter the room (Join Room). Allow to use microphone
- Move around the room using the arrows or the AWSD-keys. What happens when you use the Q and E keys?
- Click on the button: 'More' and choose: 'Room info and Settings'. Choose a different room via 'Change Scene' and give your room a room name you came up with yourself.
-
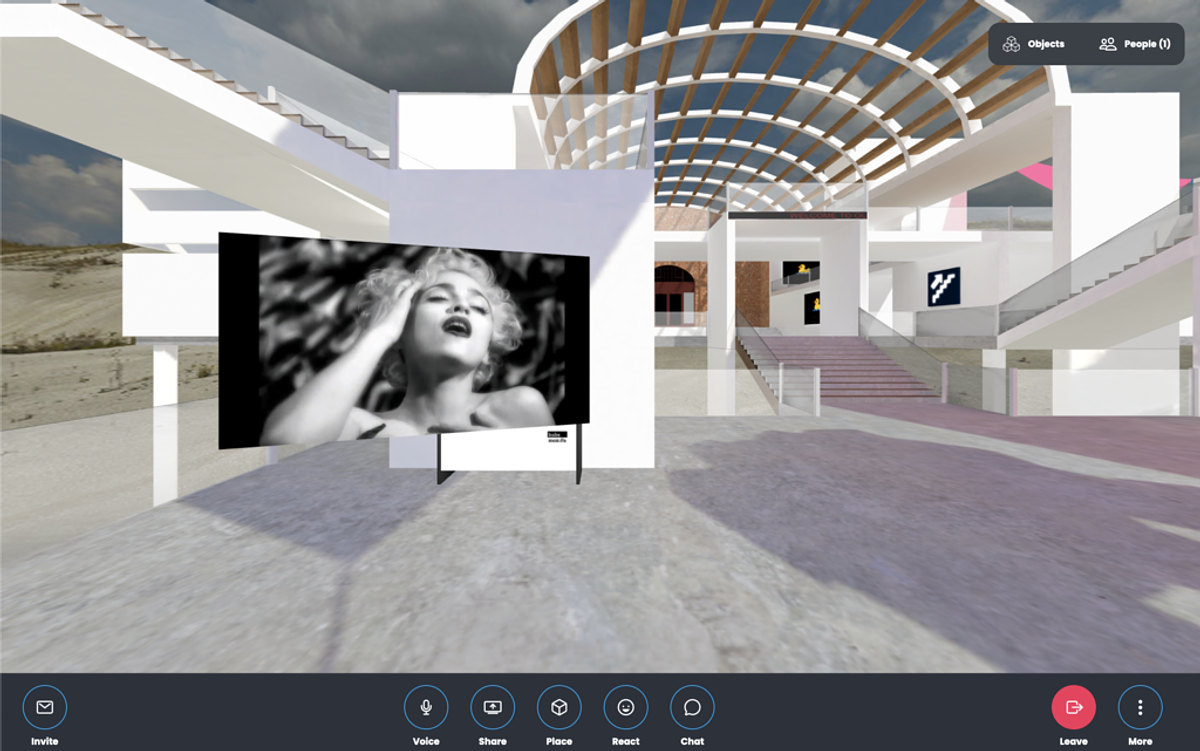
Share a Vimeo or Twitch-video of your favorite band/artist/influencer here
Just copy and paste URLs into your browser window
You can also drag and drop images and PDFs into your browser window. Note: only small files (max. 1-2 mb) and videos (max. 4 mb). - Hang 3 favorite photos shared on social media in your space.
Now share your url to your friends and walk through your space together.

STEP 2 MAKE YOUR OWN AVATAR + GROUP-SELFIE
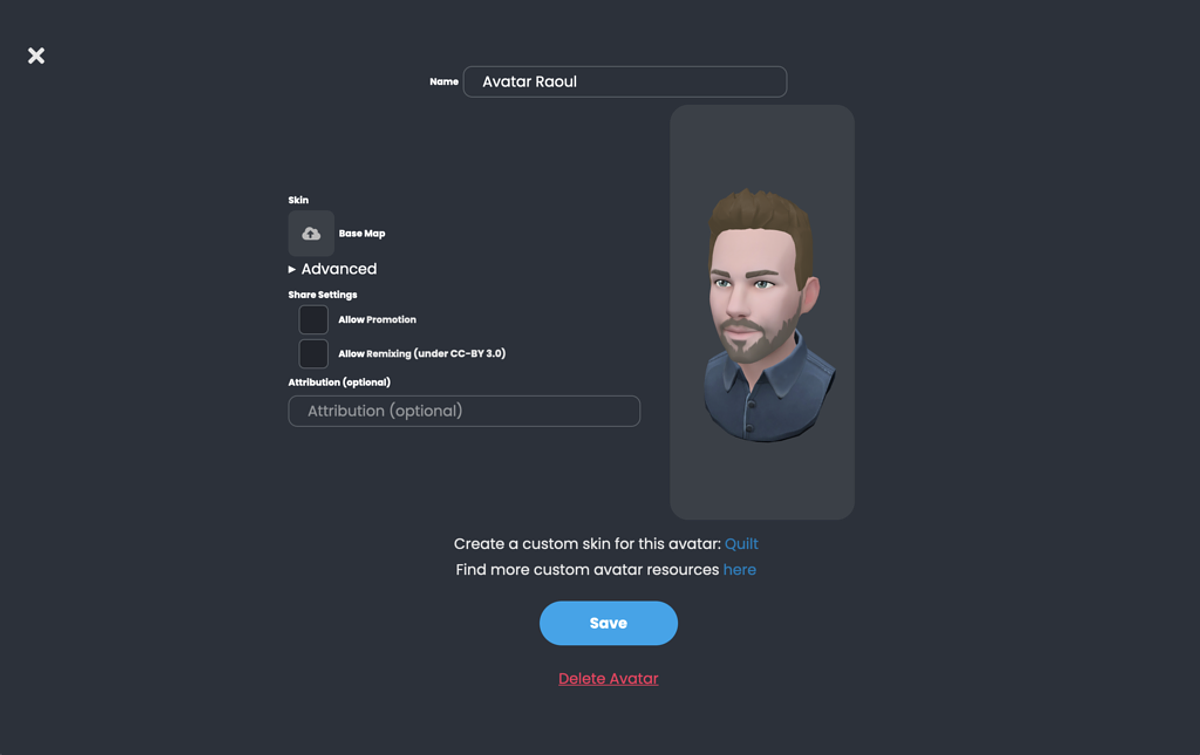
You can create your own Avatar that looks a bit more like you. Once you have it ready, download a .glb file. GLB files are 3D files and can be pasted into the Mozilla Hubs space or linked as your own Avatar.
- Create your own avatar with: Hubs Avatar Maker
- Or create your own avatar with: Hubs Robot Maker
- Make your owns avatar that looks like you (webcam or smartphone needed): Ready Player Me
WARNING: Choose Halfbody Avatar. Fullbody avatars do not work in Mozilla Hubs.
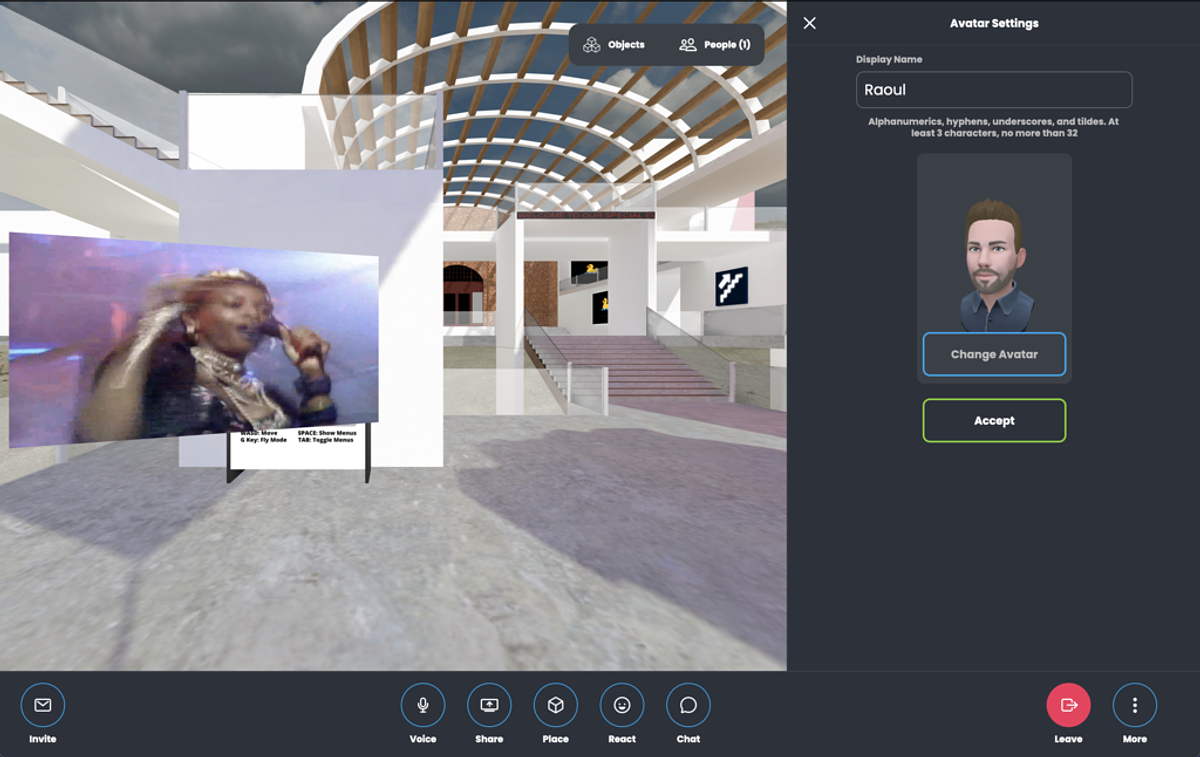
Go to your Hubs-room, click 'More' and choose 'Change Name and Avatar'.
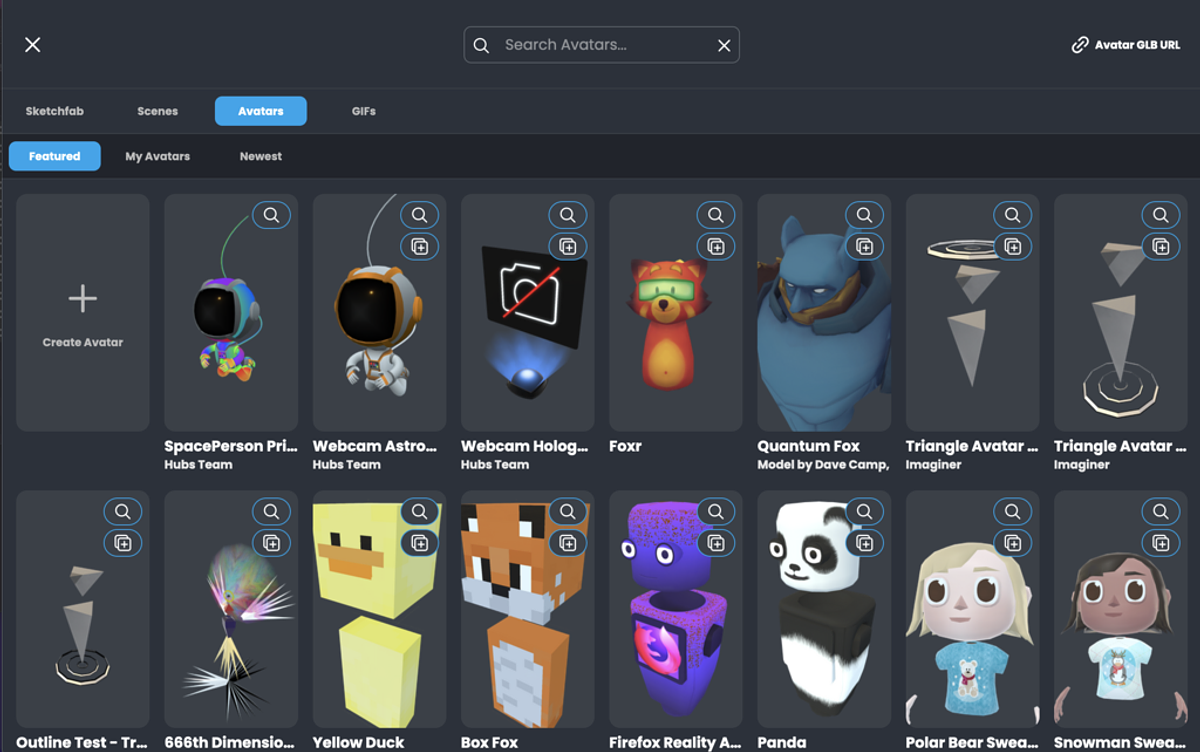
Click on your current avatar 'Change Avatar' and do:
-
My Avatars + Create Avatar
- If you are logged in you can upload your .glb file via the upload link: 'Custom GLB'
- If you have a link to an Avatar, such as with Readyplaye.me, you can also enter the link to a GLB-file at the top right.
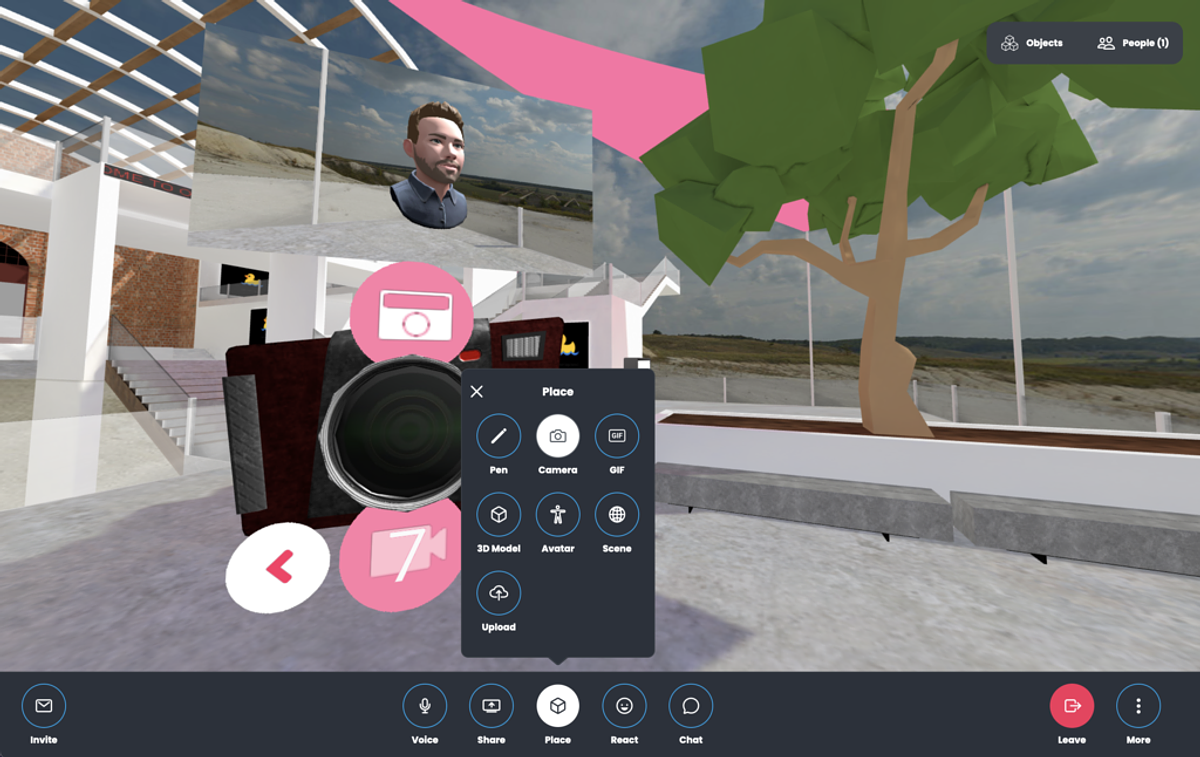
- Take a (group) selfie in the room where you are now (buttons Create + Camera)
TIP: Save your Avatar to Dropbox or Google Drive. Set sharing to Public. The share URL can be used in Hubs, but still needs a small adjustment to work:
- Example Share-link from Google Drive: https://drive.google.com/uc?export=download&id=1kNANFHa0VVsBwH1G8d5ZE3WEwjb--XkF
-
Example Share-link from Dropbox: https://www.dropbox.com/s/knlidvqarogi8i3/raoul-postel-avatar.glb?dl=1
STEP 3 BUILD WITH MOZILLA SPOKE:
- Log in to https://hubs.mozilla.com/spoke
- Start a new project and choose your own world
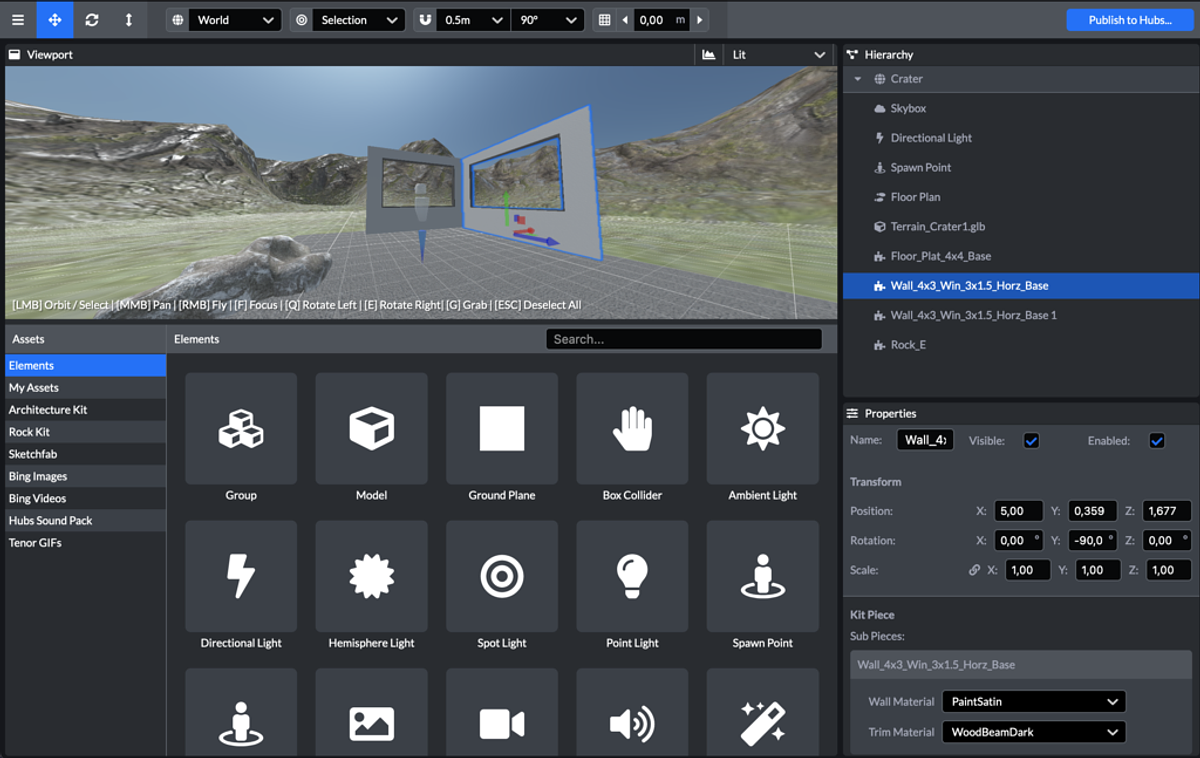
- Select the green Crator (mountains)
- Experiment with the 3 Tools at the top left of the menu bar: Move, Rotate and Scale.
Turn off the blue magnet (horseshoe) to use these tools very precisely.
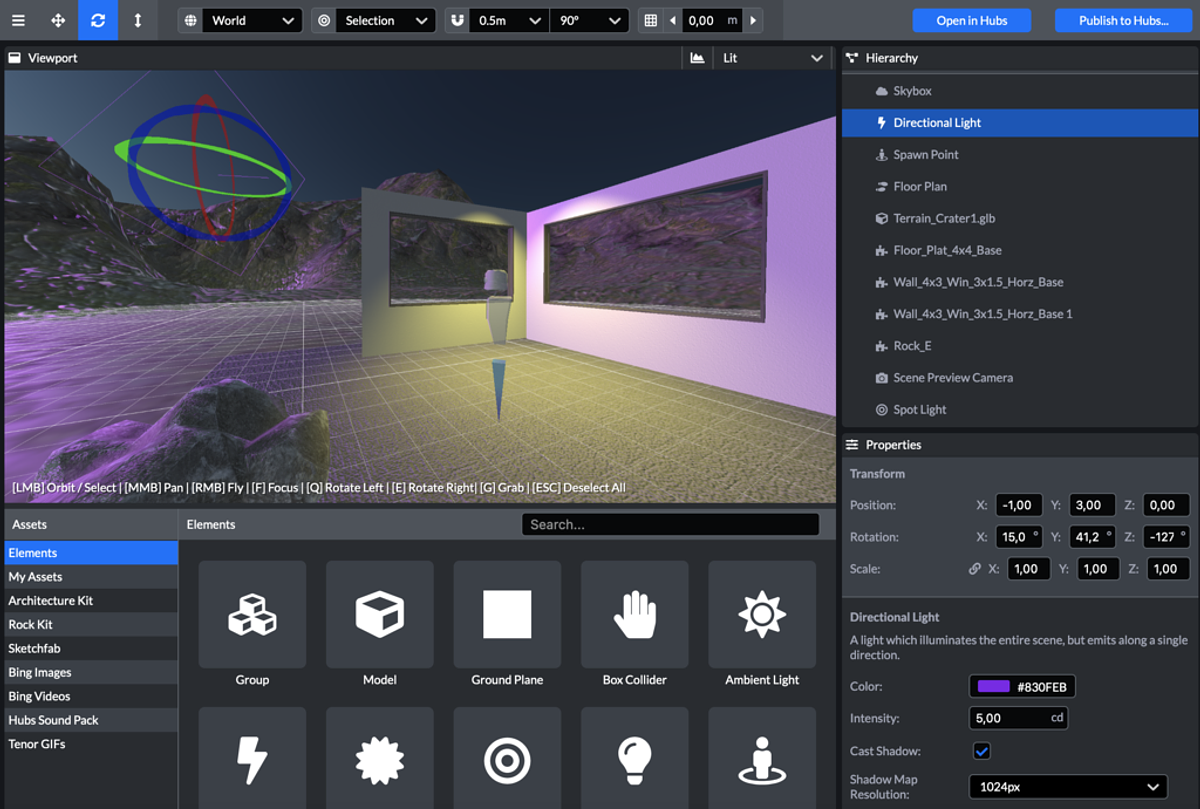
- Adjust the 'Directional Light' of the entire room. Select in Hierarchy-panel, right and change the values, right-bottom.
- Use the 'architectural objects' to draw a base plate (plane) and 4 walls that represent your room.
- Choose from the Sketchfab objects furniture that is in your room. Note that some 3D objects are too large for the space and do not load. Also type after the search term: 'poly'. These images usually have a low amount of polygons and resolution, making them easier to load into Hubs.
- Add a 'Spot-Light' in a place where extra light is needed. Choose a personal light color.
- How can you give the space even more character?
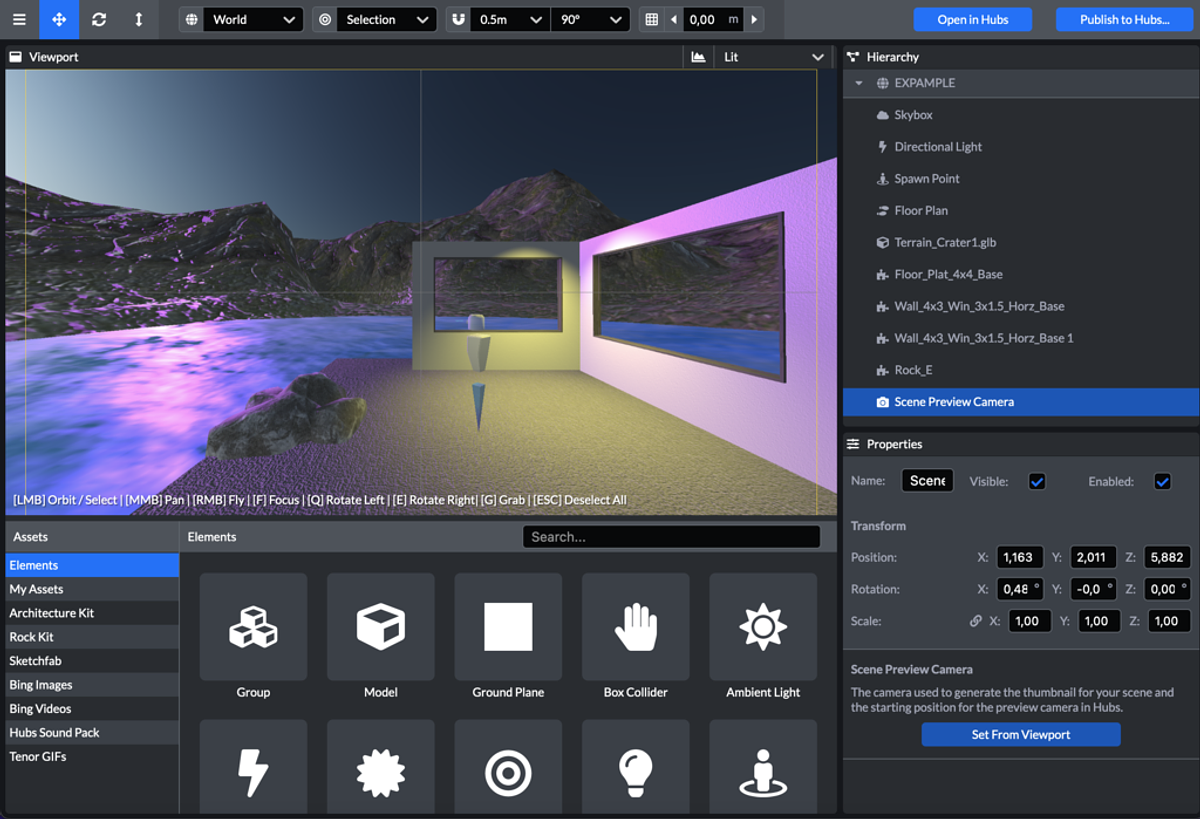
- View your scene from a nice point of view and adjust the 'Scene Camera' accordingly
- Move the 'Way Point' to where you want visitors to enter your space.

STEP 4 PUBLISH TO MOZILLA HUBS:
-
Log in to https://hubs.mozilla.com/spoke
- Open your self-built Space in Mozilla Spoke (See STEP 1, item 6).
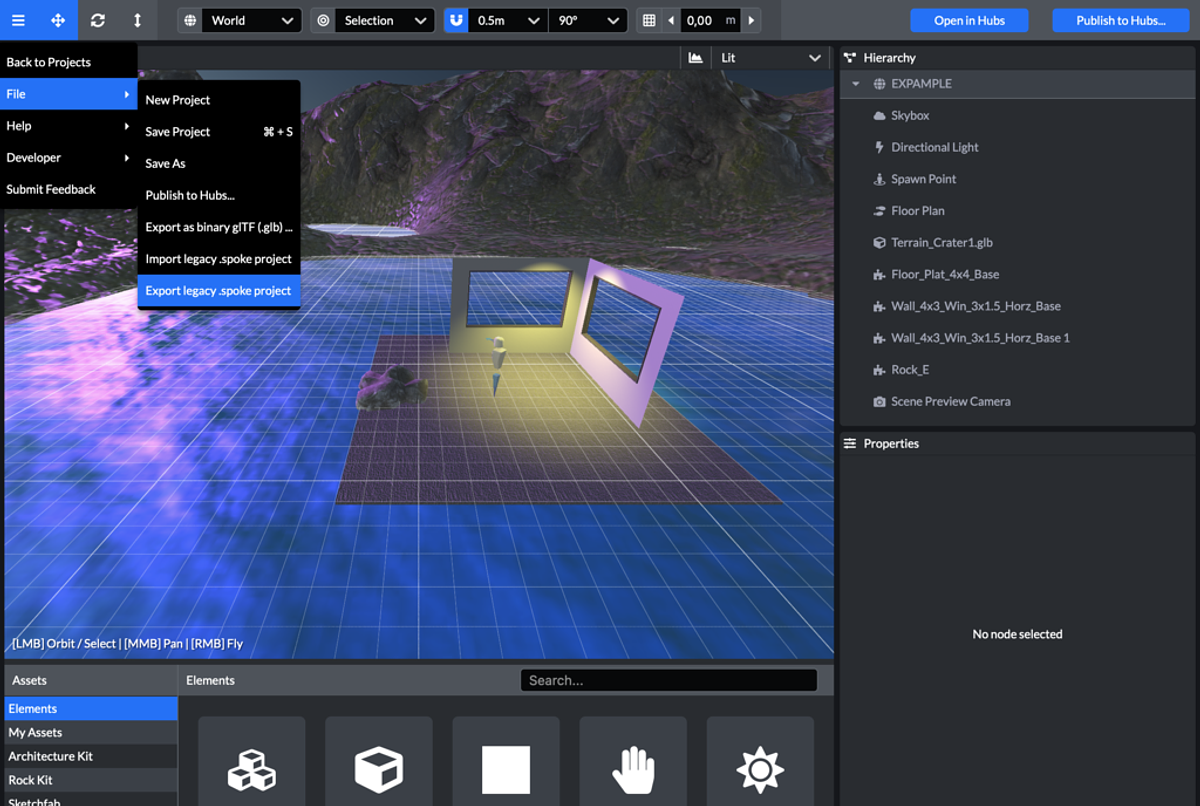
- Click on the blue button at the top right: 'Publish'
- Follow the directions in the dialog boxes.
- Go to https://hubs.mozilla.com and create a new Room (Create Room)
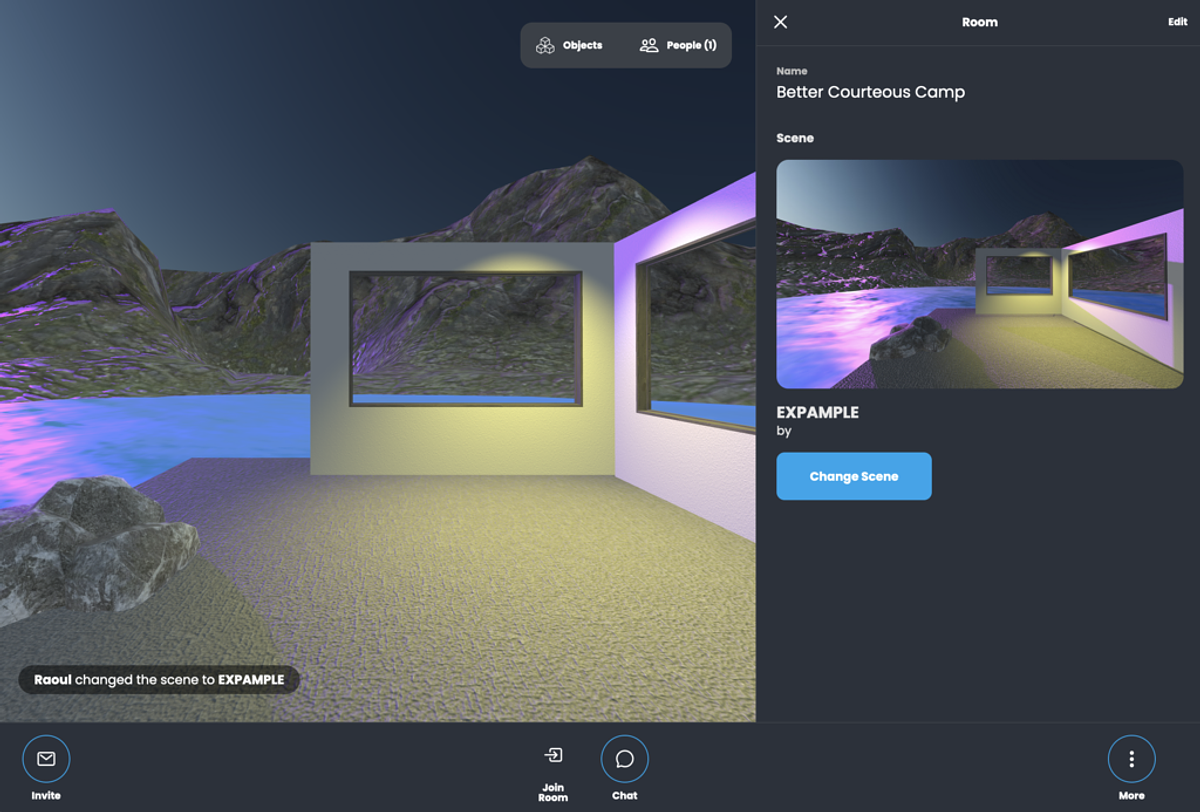
- Click the 'More' button and then 'Room info and Settings'
- Choose: 'Change Scene' and choose the 'My Scenes' tab.
- Select your newly built room and wait for the room to load.
- If necessary, give the room its own name.
-
Invite a few friends to your space via the 'Invite link'

ALTERNATIVE BUILDING WIDTH MAGICAVOXEL AND BLENDER
- Download and install the free 3D software MagicaVoxel
- Download and install the free 3D software Blender
- Open MagicaVoxel and draw your own world/building in cubes. This looks a bit like MineCraft.
- Start building with online Help-tutorials.
- Export your world/building as .obj file
- Open Blender and import the .obj file via 'import'
- Or draw in Blender your own objects
- Check the button at the top right: 'Material Shading' (Material Preview).
- Export the file as a gltf/glb file.
- Place the glb-file in your Hubs or Spoke space.
You can now walk through your own creation in VR!
Software to build in 3D: Blender, MagicaVoxel, Minetest
You can use as a source of inspiration: SketchFab
In Mozilla Hubs, you can only upload 3D files as .glb plaatsen.
ASSIGNMENT 1:
Download this open-box.glb to get you started.
Drag this file into your space in Spoke.
Once this is placed, you can enlarge, rotate, reduce, duplicate (control + D).
By cleverly stacking and rotating these, you can create a simple building.
Once you have a base building, open the Architecture Kit tab under Assets. Then choose the Stairs. By connecting the floors of the stacked boxes with stairs, you can walk through your building as an avatar.
TIP: if you use walls from the assets Architecture Kit, you will see that they are invisible on 1 side. It is therefore preferable to use the floor assets from this kit for the walls. Of course you can also create a square piece of wall in Blender and export it as a GLB file. Then both sides are visible. By scaling and turning you can create as many walls as you need.
ASSIGNMENT 2:
Furnish your building with:
- three images (jpg format, maximum 1024x1024 pixels)
- three lights fitted via Spoke
- three links to friends' rooms
- two Vimeo-videos. Vimeo works better then Youtube in Mozilla Hubs. TIP: Switch Vimeo-video's on Public to play directly into your Hubs room.


CONTACT
Team Work in VR
+31(0)6 14 657 653
Utrecht, The Netherlands
CoC: 20118458
ABOUT US
We facilitate an innovative, safe and hybrid way of working together in virtual reality. Regardless of time and place. As pioneers in new media and technology, we build a future-oriented way of working.